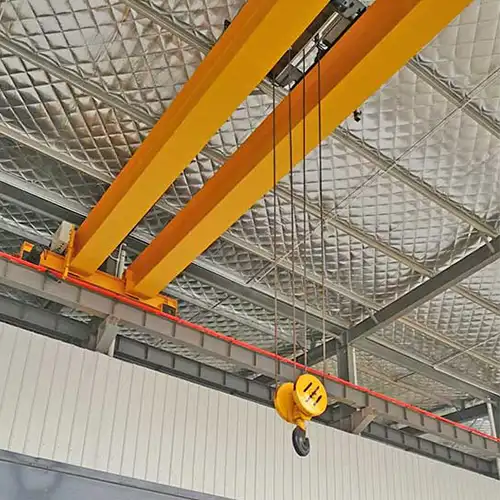
3–100 Ton Overhead Cranes in OTR Tire & Rim Factory to Warehouses
Overhead crane for sale. Tailored 3 ton to 100 ton overhead bridge crane for OTR tire & rim factory to warhouses. Check guide on Choosing, Buying & Uses
| Application | Material handling, lifting, positioning, assembly, maintenance, loading/unloading, |
| Certifications | CE / ISO / SGS / Other third-party inspection |
| Customization | Customized material handling cranes solutions available for indoor, outdoor, hazardous, corrosive, cleanroom, and heavy-duty industrial applications. |
Crane Manufacturer: Yuantai Cranes – 30+ Years Professional Crane Manufacturer from China
Category: Featured
Tags:
Your Trusted Overhead Crane Manufacturer & Supplier
Overhead Cranes for OTR Tire & Rim Facilities:
Overhead Crane Full Guide to Choosing, Buying, and Uses
3–100 Ton Overhead Cranes in OTR Tire & Rim Factorys to Warehouses
Focus: Practical guide for choosing overhead cranes (3–100 ton) for OTR tire & rim manufacturing plants, assembly halls, and warehouses, with special attention to layout design, workflow optimization, and crane positioning.
OTR Tires & Rims – Big, Heavy, and Tough to Handle
OTR (Off-The-Road) tires and rims are massive. Some weigh just a few tons, while the largest can easily go past 100 tons when you include the tire, rim, and mounting fixtures. These aren't just big rubber rings — they're key components for mining trucks, earthmovers, and other heavy machines.
- Tire Size: Diameters can exceed 4 meters.
- Weight: Ranges from 3 tons for smaller OTR tires up to 50+ tons for ultra-class mining truck tires.
- Handling Risks: If a tire or rim slips, it can cause serious damage or injury.
This sheer size means forklifts, pallet jacks, or manual handling are out of the question. Facilities need reliable overhead cranes and lifting systems to do the job safely.
Key Challenge – Moving Loads Through the Plant
In a typical OTR facility, a tire doesn't just sit in one place. It moves through several zones — raw material intake, tire-building, curing, inspection, warehouse storage, and finally shipping.
Each zone has its own challenges:
- Receiving & Storage: Unloading raw materials or rims from trucks or containers.
- Tire-Building Area: Precise placement of green tires onto machines.
- Curing Hall: Lifting molds or presses that can weigh dozens of tons.
- Warehouse & Shipping: Moving finished tires and loading them onto trailers.
Keeping this flow smooth is critical. If one crane is down or poorly positioned, production can back up quickly. That means lost hours — and in a 24/7 plant, that's lost revenue.
Objective – Build a Smarter Crane + Layout Solution
The goal of this guide is simple: help plant managers and buyers choose the right overhead crane setup for their facility layout.
We'll walk through what matters most:
- Crane Capacity: Matching the crane to the heaviest load in your plant.
- Span & Coverage: Making sure every key area is reachable without wasting travel time.
- Lift Height & Clearances: Enough space to clear presses, racks, and trusses.
- Workflow Efficiency: Designing crane runways and aisles to avoid congestion.
- Safety: Protecting workers and expensive equipment at every stage.
Your Facility Layout & Workflow
Planning your facility layout is the first step to ensuring cranes operate efficiently. A smart design reduces travel time, prevents congestion, and improves overall safety.
Material Flow Mapping
Before installing overhead cranes, it's essential to understand how materials move through your facility.
- Identify all pickup and drop-off points: curing presses, storage racks, assembly stations, and truck loading areas.
- Plan the shortest travel paths for cranes to minimize handling time and energy consumption.
- Avoid overlapping crane paths to prevent congestion and improve workflow.
Key Zones in OTR Facilities
Raw Material Receiving Yard
- Handles rims, bead wires, and rubber compounds.
- Cranes must support heavy loads, sometimes in outdoor conditions.
Tire Building & Assembly Hall
- Movement of tire carcasses and rim assemblies between stations.
- Cranes need precision placement capabilities to reduce manual handling.
Curing & Press Area
- Requires very high hook heights for loading and unloading presses.
- Typically uses double girder or specialized high-capacity cranes.
Inspection & Finishing Area
- Localized lifting at quality control and finishing stations.
- Single girder or jib cranes are usually sufficient.
Warehouse & Distribution Yard
- Storage of finished tires and rims; loading for shipment.
- Gantry cranes or high-capacity EOT cranes help optimize stacking and container handling.
Layout Goal
The main objective is to minimize crane travel, reduce bottlenecks, and ensure smooth operations. A well-designed layout not only improves productivity but also extends crane life and enhances workplace safety.
Crane Types Mapped to Facility Layout
Matching the right crane type to each facility zone is essential for efficiency, safety, and smooth workflow. The table below helps buyers quickly identify suitable crane solutions for each area.
| Plant Zone | Recommended Crane Type | Key Layout Considerations |
|---|---|---|
| Receiving Yard | Gantry Crane / Semi-Gantry | Outdoor coverage, rail placement, container loading/unloading space, handling heavy rims and bundled tires efficiently. |
| Assembly Hall | Single Girder Overhead / Jib Crane | Span must cover assembly bays, low headroom design, precise movement to reduce manual handling. |
| Curing Press Hall | Double Girder Overhead (20–100T) | Max hook height to clear presses, smooth cross-travel, repeated heavy lifts with minimal downtime. |
| Finishing Area | Jib Crane / Workstation Crane | Short lifts at quality control, ergonomic rotation, avoid obstructing floor traffic. |
| Warehouse & Shipping | Gantry Crane / Bridge Crane | Wide span for pallet stacking, efficient truck bay loading/unloading, flexible for varying pallet sizes. |
Buyer Insights / Tips
- Early Planning: Coordinate crane layout with building architects to avoid costly retrofits.
- Hook & Beam Clearance: Ensure sufficient approach distances for smooth operations.
- Power Supply Routing: Plan control and power lines to avoid operational bottlenecks.
- Zone-Specific Design: Consider crane capacity, travel speed, and lifting frequency for each area.


Capacity Ranges & Layout Impact
Crane capacity is critical for both selecting the right equipment and planning your facility layout. The following guide maps typical lifting capacities to operational zones and layout considerations. Click to learn more about the hot sale capacity of our overhead cranes.
| Capacity Range | Typical Applications in OTR Facilities | Layout & Design Considerations |
|---|---|---|
| 3–10 Ton | Localized lifting of small rims or medium tires; workstation coverage | Minimal runway requirements; suitable for narrow bays or low headroom areas. |
| 10–30 Ton | Medium OTR tires, rim assemblies, curing components | Wider spans may be needed to cover multiple workstations; consider travel paths and aisle width. |
| 30–50 Ton | Large molds, curing presses, oversized tire components | Layout must allow free hook travel; avoid obstructions to ensure safe cross-travel. |
| 50–100 Ton | Exceptional loads, specialized heavy equipment | Requires reinforced foundations, strong runway beams, and adequate headroom clearance. |
Buyer Insights
- Plan Ahead: The heavier the crane, the more impact on building structure and foundation design.
- Hook Approach: Ensure sufficient clearance above workstations and machinery to prevent collisions.
- Span & Travel: Wider spans and longer runway lengths may be necessary for mid- to high-capacity cranes.
- Future Growth: Consider potential load increases to avoid needing a full redesign later.
Key Buyer Considerations
When planning overhead cranes in OTR tire and rim facilities, it's not just about lifting capacity. The layout and integration of cranes within your building are equally important for safety, efficiency, and future-proofing your operations.
Critical Factors for Buyers
- Span & Bay Coverage: Ensure the crane can reach every part of its assigned bay without leaving dead zones. Full coverage of overhead cranes minimizes manual handling and maximizes workflow efficiency.
- Hook Approach & End Clearance: Proper clearance near columns, walls, and other obstacles avoids wasted floor space and reduces the risk of collisions.
- Lift Height & Obstructions: Take into account roof trusses, lighting, HVAC ducts, and other overhead installations that could interfere with crane travel.
- Runway Beam Placement: Early coordination with the civil or structural team is crucial. Correct beam positioning prevents costly retrofits and ensures safe crane operation.
- Traffic Flow: Plan crane paths to minimize conflicts with forklifts, automated guided vehicles (AGVs), and pedestrian traffic. Safe, predictable travel routes improve overall productivity.
- Future Expansion: Design runways and crane foundations with potential upgrades in mind, whether it's higher load capacity or adding an extra crane later.

Safety & Compliance for Layout Design
Safety Comes First – Protect People, Product, and Equipment
When you're planning an overhead crane system for an OTR tire or rim plant, safety should never be an afterthought. Big loads and tight spaces mean even a small mistake can turn into a serious incident. The right layout and equipment features help prevent accidents before they happen.
Aisle Width and Operator Visibility
Operators need to see where the hook and load are going at all times. Narrow aisles or poor sightlines increase the risk of collisions or dropped loads.
- Recommended Clearance: Leave enough width between runways, racks, and machinery so loads can travel freely.
- Pedestrian Safety: Mark walkways clearly and separate them from crane travel zones whenever possible.
- Lighting: Good lighting reduces blind spots and makes operator work safer.
Multiple Cranes? Avoid Runway Traffic Jams
Many OTR facilities run two or more overhead cranes on the same runway. Without proper control systems, they can bump into each other or even trap a load.
- Anti-Collision Systems: Install electronic limit switches or laser-based sensors to maintain safe distance between cranes.
- Zoning: Divide runways into zones so cranes operate only in their assigned area.
- Operator Training: Teach crane operators how to coordinate moves when sharing a runway.
Load Stability and Precision Placement
OTR tires and molds are bulky and sometimes awkward to handle. Load sway can cause dangerous pendulum motion, especially if the aisle is tight.
- Sway Control: Use Variable Frequency Drives (VFDs) or automated sway control systems for smooth starts and stops.
- Slow-Speed Hoisting: Precision lifting mode allows careful positioning when working near presses or racks.
- Tag Lines & Guides: For very large tires, guide ropes or mechanical stabilizers keep loads steady.
Standards and Compliance
Crane installations must meet recognized safety and engineering standards — both for the crane itself and for how it integrates with the building.
- OSHA (U.S.): Workplace safety requirements for lifting equipment.
- CE / ISO (Europe & Global): Compliance with European directives and international standards.
- CMAA / FEM Classifications: Define crane duty cycle and structural design requirements.
- Inspection & Maintenance Plans: Schedule regular checks to meet compliance and avoid costly shutdowns.
Practical Tip
Plan for safety early in the design stage. It's far cheaper to design proper clearances and install collision systems up front than to retrofit later after an accident or near miss.
Cost & ROI (Layout-Linked)
When evaluating overhead cranes, buyers often focus on the upfront cost. While this is important, considering layout and long-term ROI is equally critical. A well-planned crane system can save money, improve safety, and increase efficiency over the life of the equipment.
Direct Costs
- Crane purchase price based on capacity and type.
- Runway beams, foundations, and building modifications.
- Power supply, control systems, and installation expenses.
Indirect Savings
- Optimized layout reduces unnecessary lifts and crane travel.
- Shorter travel paths and fewer handling steps increase throughput.
- Less congestion minimizes accidents and downtime.
Lifecycle ROI
- Properly designed crane paths prevent damage to expensive OTR tires and rims.
- Efficient material flow lowers labor costs and improves production speed.
- Investing in the right layout and crane system upfront pays off in long-term operational efficiency.
Global Best Practices
Looking at global leaders in overhead crane solutions can help buyers understand best practices for layout, efficiency, and safety in OTR tire and rim facilities. Each country offers unique approaches based on engineering standards, operational priorities, and building constraints.本
China: Cost-Efficient Gantry Solutions
- Popular for large outdoor receiving yards and distribution centers.
- Offers competitive pricing for high-capacity gantry and semi-gantry cranes.
- Focused on practicality: robust systems that handle heavy loads efficiently, even in harsh weather conditions.
Germany & Japan: Layout-Based Automation & Industry 4.0
- Emphasis on integrating cranes with automated material flow systems.
- Smart crane controls and predictive maintenance reduce downtime.
- Optimized layouts for both manufacturing floors and warehouse zones ensure smooth, uninterrupted operations.
USA: OSHA-Compliant Layouts & Modular Runways
- Strong focus on safety standards and regulatory compliance.
- Modular runway and bridge designs allow for easier upgrades or facility expansions.
- Planning prioritizes minimal obstruction, clear crane paths, and safe interaction with forklifts and personnel.
Italy: Flexible, Custom Crane Design
- Specializes in solutions for constrained or non-standard buildings.
- Custom layouts ensure full coverage even in narrow or low-headroom spaces.
- Ideal for facilities requiring a mix of heavy lifts and localized handling.
By examining these global best practices, buyers can identify approaches that fit their facility type, operational needs, and budget. Adopting lessons from international leaders often results in safer, more efficient, and cost-effective crane operations.
Buyer Checklist & Practical Tips
Before selecting and installing cranes, buyers should follow a practical checklist to ensure smooth operations and future-proof their facility.
- Map Material Flow: Understand all pickup and drop-off points to plan efficient crane travel paths before finalizing the building layout.
- Match Crane Span: Ensure cranes cover the maximum working area with minimal dead zones to reduce manual handling and improve workflow.
- Plan for Expansion: Design runways and foundations to accommodate additional cranes or increased load capacity in the future.
- Simulate Traffic Flow: Evaluate interactions between cranes, forklifts, and AGVs to prevent congestion and enhance safety.
- Verify Runway Load Capacity: Work with structural engineers to ensure runway beams can safely support the crane and its maximum load.
Case Studies / Examples
Real-world examples highlight how proper crane selection and layout planning improve efficiency and safety in OTR facilities.
- Example 1: 30 Ton Double Girder Crane installed with optimized runway placement → resulted in 15% shorter load travel distance, reducing cycle times.
- Example 2: Yard gantry crane repositioned to eliminate forklift bottlenecks → 20% improvement in loading efficiency.
- Example 3: Multi-crane coordination using an anti-collision system → enabled safer simultaneous lifts and reduced risk of accidents.
These examples demonstrate that even high-quality cranes need well-planned layouts and coordination to deliver maximum performance.
Following this checklist helps buyers avoid costly mistakes, improve safety, and maximize crane efficiency from day one.
Conclusion
Correct crane selection and proper layout integration are inseparable. The best crane will underperform if runways, clearances, and material flow are poorly designed.
- Early planning with architects and crane suppliers ensures efficient, safe, and future-ready operations.
- Investing in layout design upfront prevents costly retrofits and operational delays later.
- Buyers should always consider both current operational needs and potential future growth when selecting cranes and planning facilities.
By focusing on crane type, capacity, workflow, and layout together, OTR tire and rim facilities can maximize productivity, safety, and long-term ROI.


Free consultation to Confirm Parameters & Specifications and Get
Latest Crane Price & Crane Rate.
- Types of overhead cranes : _______?
- Optional: Overhead travelling crane, goliath gantry crane,Slewing jib crane, Single girder or double girder crane,small portable crane or kbk crane, etc.
- Capacity of overhead crane: _______?
- Optional: 0.25ton, 0.5 ton, 1 ton, 2 ton, 3ton, 5 ton, 10 ton,15ton, 20ton, 25 ton, 30ton,35ton, up to 550ton, etc.
- Crane span & lifting height : _______?
- Crane travelling length : _____?
- Control of overhead crane:_______?
- Optional: pendant/ remote/cabin control
- Voltage supply of overhead crane:_____?
- Eg,: 380V50/60HZ,3Phase or others,etc.
- Application/usage of crane:_______?
- Eg,: Steel mill, ,injection mold, cement,stone, concrete,granite, general manufacturing, etc.
Just leave a message via the contact form and our hoist and crane engineer will contact you with in 24working hours.
Get In Touch