Safe Overhead Crane Handling in Mold Assembly: Step-by-Step Guide
Learn safe overhead crane procedures for mold installation & removal in injection molding workshop to improve efficiency & reduce risks.Get your eot crane!
| Application | Material handling, lifting, positioning, assembly, maintenance, loading/unloading, |
| Certifications | CE / ISO / SGS / Other third-party inspection |
| Customization | Customized material handling cranes solutions available for indoor, outdoor, hazardous, corrosive, cleanroom, and heavy-duty industrial applications. |
Crane Manufacturer: Yuantai Cranes – 30+ Years Professional Crane Manufacturer from China
Category: Featured
Tags: moldhandling
Your Trusted Overhead Crane Manufacturer & Supplier
Safe Overhead Crane Handling for Mold Assembly & Disassembly
Step-by-Step Guide for Injection Molding Workshops
Why Mold Handling Safety Matters
Mold handling isn’t just another task in the workshop—it’s one of the most physically demanding and risk-prone parts of injection molding production. Whether you’re pulling a mold for maintenance or setting up for the next job, one wrong move can cause real damage.
Injury to workers, damage to the mold, or unexpected downtime—it all adds up fast. That's why planning for safe lifting isn't just smart, it’s necessary.
Here’s what’s commonly at risk:
- Injuries to operators or technicians
Molds are heavy and often have sharp edges or pinch points. A dropped or unbalanced mold can easily cause foot injuries, crushed fingers, or worse. - Mold damage
A mishandled lift can scratch or bend guide pins, damage alignment surfaces, or warp platens—repairing that isn’t cheap. - Equipment failure or breakdown
Using an undersized crane or damaged rigging gear can stress the entire lifting system. Even a minor failure can take your production offline. - Production downtime
If a mold falls, gets stuck, or needs realignment, you’re not just losing time—you’re holding up customer orders and possibly risking penalties. - Safety violations and legal risk
In many regions, mold handling falls under lifting safety laws. Failing to meet these requirements can lead to fines or work stoppages.
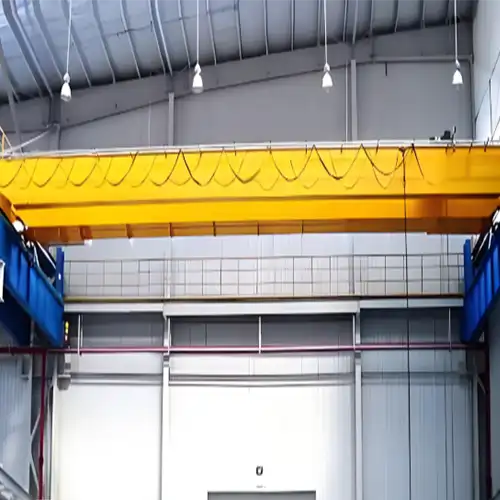
32 ton double girder overhead crane for mold handling for your reference , click to lean more on Blow, Injection, Compression, & Rotational Molds & Dies Handling Hoist and Cranes
Pre-Lift Preparation
Before you even think about lifting a mold, a good prep routine will help avoid disasters. No matter how experienced your team is, skipping a quick safety check can lead to big issues later. This isn’t just about being careful—it's about being smart.
A. Rigging Check
When it comes to rigging, you can’t cut corners. If your rigging gear isn’t up to the job, the entire lift is at risk.
- Select slings and chains based on mold weight and condition
This is the first step in making sure you’ve got the right gear. For heavy molds, make sure the slings and chains are rated for the right weight. If the mold is small or unusually shaped, you may need specialized rigging to keep it stable. - Inspect hooks, lifting rings, and straps for wear or damage
Before each lift, take a look at the gear. Look for frays, rust, or cracks in hooks and rings. Even small damage can compromise the whole lift. If something looks off, replace it—no exceptions.
B. Mold Attachment
This is where precision matters. Attaching the mold to the crane might sound simple, but doing it wrong can create dangerous situations.
- Install lifting rings correctly—tight and flush
Make sure lifting rings are installed properly and are flush against the mold surface. If there’s slack or if they’re tilted, the load might shift during the lift. Double-check everything is tight before you start. - Verify mold weight doesn’t exceed crane capacity
If you don’t know the exact weight of your mold, it’s time to get that info. Overloading the crane can lead to catastrophic failure. Always verify that the crane's lifting capacity exceeds the weight of the mold, including a safety margin. It’s better to be safe than sorry.
Lifting the Mold Safely
Now that your rigging and attachments are set, it’s time to lift. But this isn’t just about getting the mold off the machine—it’s about doing it safely, steadily, and with full control. A rushed or uneven lift can lead to damage or injury. So slow it down, keep it smooth, and always stay alert to how the mold moves.
A. Balance & Lift
Lifting starts with balance. If the mold isn’t evenly supported, it will tilt or swing—and that’s where accidents begin.
- Use the crane hook to find the center of gravity
Before lifting the mold completely, raise it slightly and observe. If one end tips or swings, lower it back down and adjust the rigging. Finding the center of gravity may take a couple of tries, but it's worth doing right. - Lift slowly—no jerks, no shortcuts
Smooth movement is key. Start lifting gently, just enough to clear the platen. Avoid sudden pulls or high-speed lifting. If something doesn’t feel right, stop immediately and check. Rushing is one of the fastest ways to damage equipment—or worse, get someone hurt.
B. Stability & Locking
Once the mold is off the platen, keeping it stable and under control is your next priority.
- Lock mold plates unless dual-hook lifting is required
If you’re using a single hook to lift, make sure the mold halves are clamped together. Lifting an unlocked mold can cause it to open mid-air, throwing the center of balance completely off. Only leave it unlocked if you're using a synchronized dual-hook lift. - Align mold cleanly with the machine platen before lowering
When reinstalling a mold, lower it slowly and double-check that everything lines up with the machine's guide pins or locating rings. Don't force anything into place—if it's misaligned, stop and adjust. A small mistake during lowering can lead to broken pins or an unusable mold.
Top 3 Mold Lifting Mistakes to Avoid
Even experienced operators can fall into bad habits—especially when the schedule gets tight. But some shortcuts just aren’t worth the risk. Here are three common mistakes that cause real trouble in mold lifting. Avoid these, and you’re already ahead of the game.
Fast Lifts → Sudden Load Shifts
Lifting too quickly can make the mold swing, shift, or even spin slightly. That sudden movement puts extra stress on your slings, hoist, and crane—and it can catch nearby workers off guard.
- Why it happens: Operators rush or assume the mold is well-balanced without checking.
- What to do instead: Always start slow. Let the crane take up tension gently and watch how the mold reacts in the first few centimeters of lift.
Side Pulls → Rigging Failure Risk
Trying to lift the mold when the hook isn’t centered directly above the load is a serious no-go. This creates a diagonal pull, which your slings and hoists weren’t designed to handle.
- Why it happens: Hook isn’t repositioned, or mold isn’t directly under the crane line.
- What to do instead: Realign the trolley and bridge so the hook is directly above the mold’s center. Never drag the mold sideways with the crane—it’s not made for that.
Hanging Mid-Air → Unnecessary Strain
Leaving a mold suspended in mid-air for too long isn’t just risky—it adds long-term stress to your crane and rigging gear. It can also be a serious safety hazard if someone walks under the load.
- Why it happens: Operator gets distracted or waits for another task before lowering.
- What to do instead: Plan the lift so you’re ready to move the mold directly to its next position. If there’s a delay, lower the mold to a safe resting spot until you're ready.
Safe Mold Removal Steps
Removing a mold from the injection molding machine isn’t just about unbolting and lifting—it’s a careful process that protects both your equipment and your team. Skipping even one small step can lead to damaged molds, rust issues, or misalignment next time you reinstall.
Take your time and follow a clear, steady process.
A. Prep Work Before Disassembly
Before anything gets loosened or lifted, the mold needs to be in the right condition. This is your opportunity to reduce wear, prevent rust, and make the next mold change easier.
- Clean the mold cavities and cooling lines
Leftover resin, dust, or grease can harden over time and cause quality issues in future cycles. Wipe down the mold surface, remove plastic remnants, and use compressed air to clear any visible debris. - Let the mold cool before applying rust inhibitor
Don’t spray inhibitor while the mold is still warm—it will evaporate or bake onto the surface unevenly. Wait until the mold is room temperature, then apply a light, even coat of rust preventive. This helps preserve the mold during storage or maintenance downtime. - Disconnect electrical and hydraulic connections safely
Unplug any thermocouples, heater bands, or hydraulic cylinders attached to the mold. Label the wires or lines if needed for easy reconnection later.
B. Step-by-Step Mold Removal
Once the prep is done, move step by step. A few minutes of care here will save hours of trouble later.
- Turn off water lines and blow them out
Shut off both supply and return lines, then use compressed air to blow out the cooling channels. This prevents leftover water from sitting in the mold and causing internal rust. - Jog the mold open ~10mm and hold lightly with clamp
Open the mold just enough (about 10mm) so the locating rings and guide pins are free. Apply a soft clamp to keep it from opening more during the lift, unless you’re doing a controlled dual-hook disassembly. - Attach rigging gear, center the crane hook, and take up slack
Install lifting eyes if they’re not already in place. Attach slings or chains and make sure they’re balanced. Slowly raise the crane hook to take up tension and check for uneven load distribution. - Unclamp and lift smoothly
Once you’ve confirmed the mold is balanced and stable, release the machine’s clamping system. Then lift slowly—just enough to clear the machine. Avoid sudden jerks or swinging. Keep hands and tools clear during the lift.
Handling Emergencies During Lifting
Even when you do everything right, things can still go wrong. Maybe a sling slips, the mold won’t budge, or the load suddenly tilts. The key is knowing what to do in the moment—without panicking or making things worse.
Quick reactions, calm thinking, and a clear plan can prevent injuries and equipment damage. Here’s how to handle three of the most common mold lifting emergencies.
Sling Failure: Don’t Panic—Lower If Safe, Secure the Area
If a sling snaps or comes loose during a lift, your first instinct might be to freeze—or worse, try to catch the mold. Don’t.
- Stay clear of the load—never step under it, even for a second.
- If the mold is still partially supported, slowly lower it to the floor or onto a support surface, using the remaining sling(s).
- Stop all crane movement immediately and secure the area—no one should approach until the mold is resting safely.
- Inspect all rigging gear before attempting another lift. One failure usually means something else is worn or set up wrong.
Stuck Mold: Pause and Recheck Attachment Points
Sometimes, even after you’ve unbolted and unclamped everything, the mold just won’t lift. Forcing it is a bad idea. It usually means something's still connected—or there’s pressure holding it in place.
- Stop lifting the moment resistance is felt. Continuing could warp or damage the mold or machine platen.
- Double-check water lines, heater wires, clamps, and bolts. Even a single missed line can hold things up.
- Use jog controls to try gently opening or closing the mold a few millimeters. Sometimes, a bit of movement will relieve mechanical tension and free the mold.
- Never try to “yank” the mold free using crane force. If it’s stuck, find out why.
Imbalance: Lower and Re-Center the Load
If the mold starts to tilt or swing off-center during lifting, the rigging setup probably isn’t balanced. This is one of the most common issues—especially with tall, uneven, or multi-plate molds.
- Lower the load immediately—but gently—back to a stable resting point.
- Adjust the lifting points to correct the angle. You may need to move slings closer together, change the hook position, or add a spreader beam.
- Re-check center of gravity. Don’t guess—do a trial lift just a few centimeters off the ground to confirm balance before going higher.
- Avoid quick corrections mid-air. It’s tempting, but adjusting the hook or trolley while the mold is suspended makes things worse.
Final Checklist & Safety Mantra
After safely removing the mold, it’s important to take a few final steps to wrap things up and ensure everything is ready for the next job. A little attention here can prevent issues down the line and reinforce safe handling practices.
Keep this simple mantra in mind for every lift:
"Check → Balance → Lift Slow → Lock Secure"
Safety Mantra: Check → Balance → Lift Slow → Lock Secure
This 4-step reminder will guide you through every mold lifting operation:
- Check the rigging, mold, and environment before starting.
- Balance the mold carefully and verify stability before lifting.
- Lift Slow—no rush, keep the motion steady and controlled.
- Lock Secure—ensure everything is locked down before lowering or moving.
This safety mantra is essential for maintaining consistent, safe practices in mold lifting operations.
Mold Handling Safety Final Checklist
Pre-Lift Prep
| Task | Check |
|---|---|
| Rigging gear is rated for mold weight and in good condition | [ ] |
| Lifting rings are installed correctly, flush, and tight | [ ] |
| Mold weight confirmed against crane capacity | [ ] |
| Water, air, electrical, and hydraulic lines disconnected | [ ] |
| Cooling lines cleaned and blown out | [ ] |
During Lift
| Task | Check |
|---|---|
| Mold slightly opened (~10mm), clamp applied if necessary | [ ] |
| Hook is centered, load is balanced | [ ] |
| Trial lift performed to check for swing or tilt | [ ] |
| Lift is smooth, with no sudden movements | [ ] |
| Mold plates are locked (unless using dual-hook lift) | [ ] |
After Lift
| Task | Check |
|---|---|
| Mold lowered to a safe storage or tool cart | [ ] |
| Sling and hook removed safely | [ ] |
| Rigging gear inspected and stored | [ ] |
| Notes made if anything unusual occurred | [ ] |
| Team reminded of the safety mantra: “Check → Balance → Lift Slow → Lock Secure” | [ ] |
Conclusion
This checklist should be printed out and kept near the crane operator’s station or in the maintenance area. It can also serve as a handy training reference for new operators. Make it a habit for your team to go through these steps before and after every mold lift to ensure smooth, safe, and efficient operations. Contact us to get your customized overhead cranes for mold handling at cost-effective price.
Cases and Projects of Types of Overhead Cranes for Mold Handling
- 2 Ton Jib Crane Application in Small Mold Handling in Thailand
- 3 Ton Adjustable Gantry Crane Lifts Diesel Generators New Zealand
- Low Headroom Gantry Crane 5 Ton for Plastic Injection Mold Handling
- 10 Ton A Frame Crane, Small 10 Ton Portable A frame crane for Mold Hoisting
- European Style 15 Ton Overhead Bridge Crane for Blow Mold Handling
- 50 ton double girder overhead travelling crane for American die factory


Free consultation to Confirm Parameters & Specifications and Get
Latest Crane Price & Crane Rate.
- Types of overhead cranes : _______?
- Optional: Overhead travelling crane, goliath gantry crane,Slewing jib crane, Single girder or double girder crane,small portable crane or kbk crane, etc.
- Capacity of overhead crane: _______?
- Optional: 0.25ton, 0.5 ton, 1 ton, 2 ton, 3ton, 5 ton, 10 ton,15ton, 20ton, 25 ton, 30ton,35ton, up to 550ton, etc.
- Crane span & lifting height : _______?
- Crane travelling length : _____?
- Control of overhead crane:_______?
- Optional: pendant/ remote/cabin control
- Voltage supply of overhead crane:_____?
- Eg,: 380V50/60HZ,3Phase or others,etc.
- Application/usage of crane:_______?
- Eg,: Steel mill, ,injection mold, cement,stone, concrete,granite, general manufacturing, etc.
Just leave a message via the contact form and our hoist and crane engineer will contact you with in 24working hours.
Get In Touch